How to send photos in the highest resolution on iPhone
How to send photos in the highest resolution on an iPhone
Looking to increase the resolution of photos and animated gifts in iMessage or Apple Mail? To send a photo of the highest quality via text or email, start by double-checking both your iMessage and Apple Mail app settings.
Why would you want to send a higher resolution photo?
Higher-resolution photos are higher quality. A cleaner, crisper photo, and easier to see and enjoy is more appealing. A blurry photo looks unprofessional and can be challenging to interpret (especially if a person, text, or other information is included).
To send the best quality image via iMessage, Read Below:
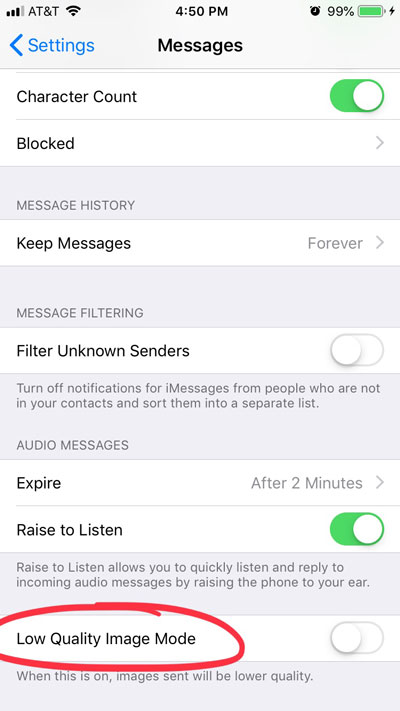
Step 1. Open Settings on your iPhone and scroll down to “Messages.”

Step 2. Open the “Messages” tab, and at the bottom of the page is “Low-Quality Image Mode.” Make sure the button is toggled to the grey, Off position. This must be off to send the highest resolution available via text and iMessage. When this toggle is turned off, photos will be sent at a lower quality, or lower resolution, than what is available. This can lead to blurry and poor photos.
Step 3. Send photos via iMessage of higher quality.
NOTE: If these three steps do not increase the clarity of photos sent via iPhones in Messages, the problem is most likely with the photo and not your settings. You can make a high-quality photo lower resolution, but you cannot make a low-quality photo high. This is because of the way cameras on the iPhone work.
To send the best quality image via Apple’s Mail app, Read Below:
Step 1. Go to the photos app and select a photo. In the image below, the photo selected in from an album, although you can select from any photo in your library regardless of the location.
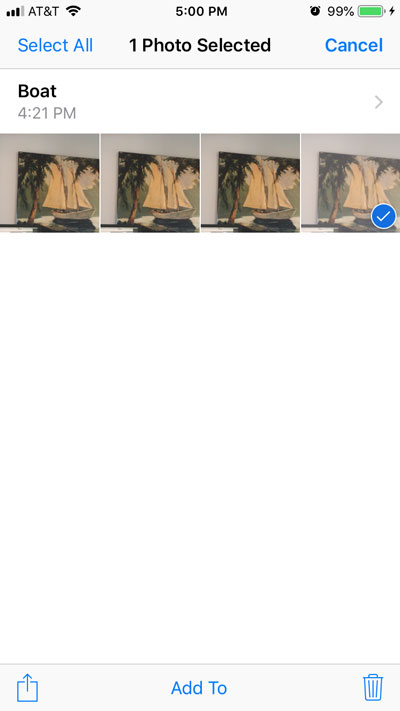
Step 2. Select the box with an arrow in the bottom left corner of your screen to expand the details and options with the selected photo.
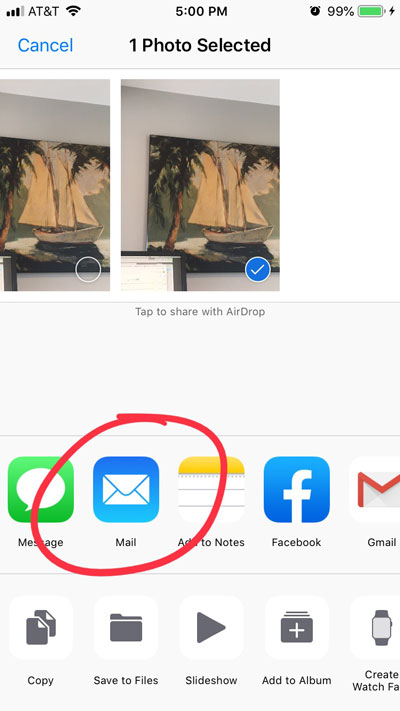
Step 3. Select the blue mail icon for Apple’s mail. (This tutorial does work for other mail apps like Gmail or Yahoo. This is specifically for the iPhone mail app Mail.)
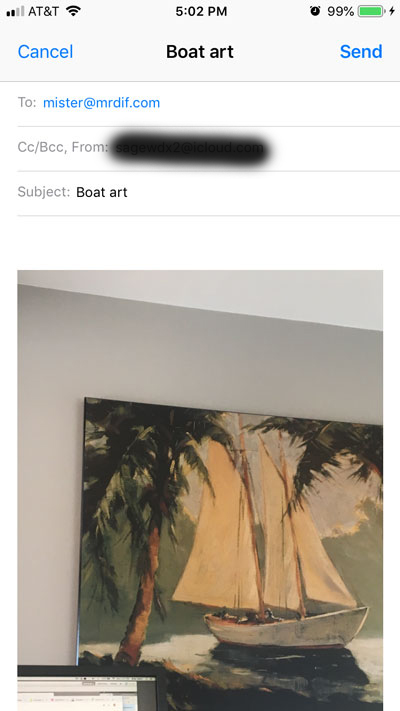
Step 4. After selecting the Mail app, you should be presented with an email draft. Add in the email’s recipient, a subject line, and any information in the body of the letter.
Step 5. When the email is ready to be sent, click Send, and you will be presented with the option to reduce the size and quality of the picture. DO NOT SELECT SMALL, MEDIUM, OR LARGE. Keep the image with the ACTUAL SIZE. For this reason, we suggest sending one photo at a time if you want the highest quality available.
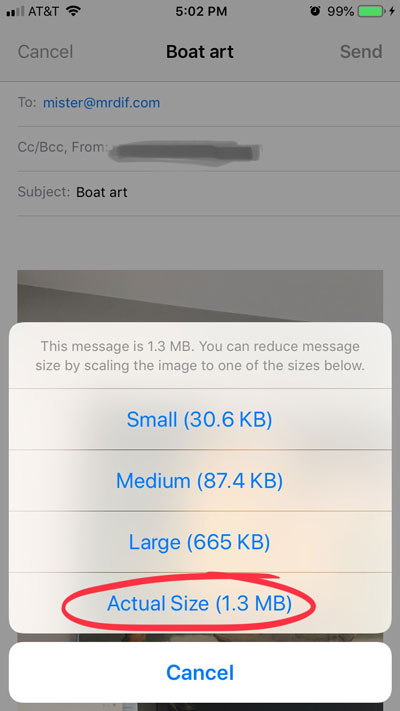
Step 6. Once the Actual Size is selected, your email will be sent with the highest resolution available!