Installing an Inexpensive SSL Certificate on MediaTemple’s GridServer
MediaTemple won’t give you support installing a 3rd Party SSL on their shared hosting GridServer product but it is straightforward and the savings can rack up over time if you compare their $75 a year charge for installing a certificate to adding one from NameCheap for as little as $9 a year. That’s right, save $66 per year per domain with this alternate secure socket layer certificate for your website.
Tip: Get a Comodo Positive SSL for $9 per year
Protect your Business with an SSL certificate
Here are the steps to in install an SSL from NameCheap onto MediaTemple’s Gridserver. There are many steps but overall it’s an easy process and tutorial to follow:
- Purchase Comodo Positive SSL from NameCheap.
- Log in to Media Temple
- Go to Domain List and select the domain
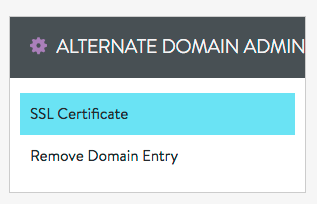
- Select SSL Certificate under Alternate Domain Admin
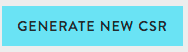
- Generate the new Certificate Signing Request
- Copy the CSR text.
- In NameCheap Manage the SSL
- Paste the CSR in the window at NameCheap
- Choose http verification
- Download the txt file from NameCheap from the details page but don’t click “done” yet at the bottom of the page. (There’s a link).
- Upload via SFTP (or FTP) to the root html directory of the site where you’re installing the SSL certificate.
- Check to make sure the file is visible on your domain at yourdomain.com/textfilename.txt
- Click the “done” button at NameCheap.
- In a few minutes you should receive an email from NameCheap with a zip file containing 2 files.
- In MediaTemple navigate to SSL Options for the selected domain.
- Select Import SSL.
- Open the 2 files from the NameCheap zip in a plain text editor or code editor. Do NOT use a Word processing program such as Microsoft Word.
- Paste the text from www_yourdomain_com.crt in the middle window.
- Paste the text from www_yourdomain_com.ca-bundle in the bottom window.
- Import the certificate and Media Temple should immediately give you a success message.
- Check the SSL. You should see these all the way down the page.

- Clear your browser cache (or open an incognito window) (Shift-Command-N on the Mac using Chrome) and test https://www.yourdomain.com.
- Make the necessary changes to resources on the site which might be showing as insecure. Use browser inspect to see which ones.
- Update Google Analytics, Google Search Console, etc with the new url.
- Eat Tacos.
Thanks so much for this
I have been scratching my head trying to figure out why their ssl cert is $75
Apart from support is there any difference to the type of certificate that namecheap would provide?
So May hosts offer free certificates now
Why on earth does mt expect us to pay $75??
Glad to help! I think they charge the $75 because of the support they have to give when switching over to SSL. I don’t know exactly what the certificate is they’re offering now. I’ve never had any issues with the NameCheap certs but I’m not securing e-commerce sites with them, just informational sites. When I can, I use the free Let’s Encrypt certificates on SiteGround. I wish I could figure out the automatic renewals for Let’s Encrypt on MT’s Grid but so far no dice. Good luck with your new cert!
Note that you now need to upload the verification text file to /.well-known/pki-validation/ folder in the root of your domain.
Thank you, Mr. Dif!
Super helpful and now we just need to get some tacos.