Easy Way to Edit the Hosts File on a Mac
The hosts file allows you to override the IP address for a website provided by DNS servers. It’s easier to edit than it might seem and doesn’t require you to edit in terminal, which can be daunting.
It’s particularly useful to test 3rd party SSL certificates at WP Engine before changing the actual DNS. Yes you can do this in Terminal. Here’s how if you want to edit hosts in terminal. But if you already have a enough geek points for the day maybe just do it this way faster.
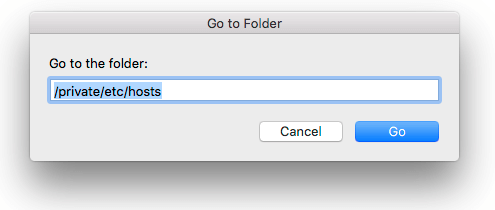
- In Finder in the top menu select ‘Go’ -> ‘Go to folder…’
- in the box type:
- Select the “hosts” file and “option” drag a copy to your desktop.
- Make a duplicate of the file as a backup copy.
- Edit the hosts file on your desktop with a simple text editor.
- Move the edited file back to the “etc” folder and replace the hosts file.
/private/etc/hosts
GENTLE WARNING: DO NOT USE MICROSOFT WORD OR ANOTHER WORD PROCESSING PROGRAM FOR THIS TASK.
You will see this warning:
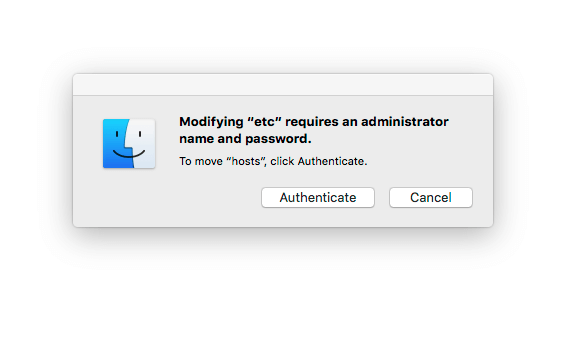
Click “Authenticate”
And then this:
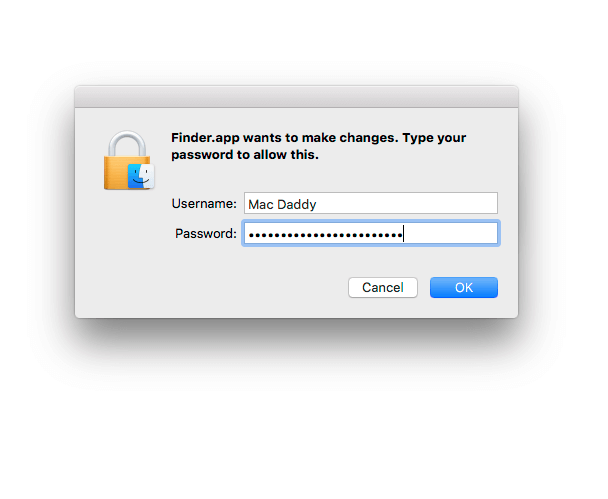
Enter your password and click ok.
And finally this:

Select replace.
To flush your DNS cache
Step 1: Open the Terminal
Navigate to Applications -> Utilities -> Terminal
Step 2: Flush DNS – Type the following command and hit enter.
Mac OS X Yosemite and later
sudo killall -HUP mDNSResponder
Mac OS X Yosemite v10.10 through v10.10.3
sudo discoveryutil mdnsflushcache
Mac OS X Mavericks, Mountain Lion and Lion
sudo killall -HUP mDNSResponder
Mac OS X Snow Leopard
sudo dscacheutil -flushcache
Okay so you do need terminal after all.